
Survey and Cogo Manual
Automatic Menu Loading:
If you are using Autocad® or IntelliCAD®
Start Autocad® or IntelliCAD®
You Must Start Autocad "As Administrator"
Right-click the AutoCAD desktop icon and choose "Run as Administrator"
Type: appload
Browse to the directory you installed the program into, the default is:
c:/Program Files/CogoSoftware/dpcogo
Depending on the software you purchased, select one of the following files: aCogoLoader.lsp or aCogoPkgLoader.lsp or aCogoDtmLoader.lsp
Now select "Load"
This will append our pull down menu to your existing menu as well as load the toolbar menus.
The menus will stay there until you unload them.
NOTE:
The above loader.lsp files will add our program paths to the default search path.
If the program gives you an error that it cannot find something then you will need to manually add the paths. Go to Tools -- Config...
Add the following paths to the AutoCAD or IntelliCAD search paths:
(assumes the default installation)
c:/Program Files/CogoSoftware/dpcogo
c:/Program Files/CogoSoftware/dpcogo/dwglib
c:/Program Files/CogoSoftware/dpcogo/toolbar
c:/Program Files/CogoSoftware/dpdtm
c:/Program Files/CogoSoftware/dproad
Once the menu is loaded, you can switch to the Metric menu if desired
(look under the "Drafting" pull down menu).
Manual Menu Loading:
In order to use the program sucessfully your CAD program will need to know the path to the CogoSoftware program and our menu (either English or Metric) must be loaded into the CAD program. If our automatic loading fails, you will have to do it manually. If you need help in doing this, please fill in a free support request at our web site.
You may manually load the menu into AutoCAD® or IntelliCAD® by doing the following:
Start Autocad® or IntelliCAD®
Open Windows explorer
Browse to the directory you installed the program into, the default is:
c:/Program Files/CogoSoftware/dpcogo
Drag the following file into your drawing: LoadMenu.lsp
The menu and toolbars should now be visible.
You may also manually load the menu into IntelliCAD® by doing the following:
Go to the "Tools" pulldown menu and select "Customize"
or at the command prompt type: menuload
A dialog box will appear
Click the "import" button at the bottom
Place a check in the box next to "Append to current menu"
Browse to c:/Program Files/CogoSoftware/dpcogo/Dpcogo.mnu
Select open
Now select the "Toolbars" tab at the top
Click the "import" button at the bottom
Place a check in the box next to "Append to current menu"
Browse to c:/Program Files/CogoSoftware/dpcogo/Dpcogo.mnu
Select open
Click the "Close" button at the bottom.
The menu and toolbars should now be visible.
------End Menu Loading Section--------
For step by step instructions for our DPpoints menu items select "Step by Step Points" from the "Table of Contents" menu above.
Before you begin go to Drafting -- Drawing
Setup
Drawing Setup - Select
English or Metric units -changes the ltscale and labeling precision, changes
dimscale to the scale of the drawing, it changes textsize to one tenth
the drawing scale (English) and to 3mm (Metric) and it changes other dimension
variables. You may use notepad to edit dpset.lsp in the Dpcogo directory
if you want to change or customize these settings.
Set points
Survey and Cogo does not use AutoCAD® point objects, It uses blocks which contain the
point node, a point number, point elevation and point description.
Set points by entering Northings & Eastings (coords) or pick a point (select).
(if you pick a point on a 3D object, the elevation will be used for the point).
You may also set points
by Traverse, Sideshot, or by entering a station and offset along an alignment.
Note: Whenever you add points
to the drawing a user definable block can also be placed there automatically,
such as an iron pipe or a power pole etc. -
See Create key descriptions below.
Point blocks
There are two point nodes placed for each point. One node is placed at the elevation of the point
on layer 3D_NODE to be used for surface modeling programs or for drawing
3D lines etc. The other node is placed at elevation 0 on layer 2D_NODE
to be used for 2D drafting.
The "Reassociate points" command will move all 2d nodes to their proper location in relation to the 3d nodes in case you move points manually and get them separated.
NOTE:
The point number is on layer DPNO, the point elevation is on layer DPEL, and the point description is on layer DPDES.
Create key descriptions
Selecting this option brings
up a dialog box in which you may enter point descriptions that will cause
a block to be placed along with the point, such as an iron pipe or a power
pole. A block (drawing file) with the same name as the description must
be placed in the c:Program FilesCogoSoftwareDpcogodwglib directory - a sampling of some
descriptions and blocks are included with the program. The list of descriptions
are kept in the file c:Program FilesCogoSoftwareDpcogodwglibdpdestd.lbr Please note that the
block will be scaled by the linetype scale of the drawing. If you are drawing
at a 20 scale then the linetype scale (LTSCALE) variable should be set
to 20. If you use the Set drawing scale option on the drafting menu, the
linetype scale will be automatically set.
The key description must be the first part of the description before any spaces.
An example: Lets say the
key is ip for iron pipe - when the program sees the key ip, it places the
block ip.dwg at the point location.
The following are valid
descriptions:
ip
ip bent
ip 1/2"
Create line descriptions
This command is being phased out. The import linework command will automatically find line descriptions from the point file.
Selecting this option brings
up a dialog box in which you may enter line descriptions that will cause
a layer to be created and linework to be drawn on it from a point file
(See Import line file).
If a line description was
set up for ep, then any line name beginning with "ep" would be placed on
layer ep.
Downloading a Data Collector
Use the software that came with
your Data Collector to download to a file in one of the following formats:
Point Number,
Northing, Easting, Elevation, Description (PNEZD) or
Point Number,
Easting, Northing, Elevation, Description (PENZD).
This file may then be imported
using the import points and/or the import linework commands.
Point symbols and lines are automatically drawn.
Example: Let's say you are downloading from a Sokkia SDR33.
If you use the ProLINK Comms program, which came with the Sokkia SDR33, you will need to send the data from the SDR33 in POS view. This option is under the Communication Menu. Once the data is in ProLINK Comms as coordinates then there is a format conversion that will convert to the format that you wish.
Point display
Points display on
will set pdmode to 3 (displays an x) and pdsize to 0.03.
Points display off
will set pdmode to 1 (no display).
Points display select
will allow the user to select a point display mode.
Zoom to points by number
will center the point in the current display.
Renumber points add
a numeric value (+ or -) to existing point numbers.
Select points by number
will make a selection set of points by entering a range of point numbers.
Use the previous selection set "P" option to use these points in another
command (such as nodelist or twist).
Select points by description
will make a selection set of points by finding a matching description.
Enter the description to find. Use the previous selection set "P" option
to use these points in another command (such as nodelist or twist).
Change point layer by
number will move points to a different layer by entering a range of
point numbers. Enter the range of point numbers and the layer to move to
(the layer must exist in the drawing).
Change point layer by
description will move points with a certain descrption to a different
layer. Enter the description to find and the layer to move to (the layer
must exist in the drawing).
Add text to elevation
by desc. Will
add text to an elevation , such as adding TC= to an elevation (i.e. TC=600.00),
by finding a matching description.
Add text to elevation
by select Will add text to an elevation , such as adding TC=
to an elevation (i.e. TC=600.00), by selecting a point or group of points.
Reset elevation by desc.
Will reset the elevation text to the elevation of the point by finding
a matching description.
Reset elevation by select
Will reset the elevation text to the elevation of the point by selecting
a point or group of points.
Boundary Traverse and Sideshot
Set points using a boundary
traverse or sideshot (use vertical angle or difference in elevation). Select
a point to occupy by point number, or pick a random point graphically,
then select a point to backsite - enter as many sideshots as you need.
When done press enter - the program will move you to the last point that
you set and backsite the point that you were on before - continue with
traverse or sideshot. Note: In order to set on or backsite an existing
point in the drawing you must enter the point number.
Draw Traverse - Draw by entering bearings and distances and curves. Good for inputing an existing boundary.
Radial Stakeout
Enter a point number to
occupy. Then enter a point number to backsite. You will be prompted to
create or select a file. If you select an existing file, the new data will
be appended to it. You may graphically select all the points that you want
to include in the stakeout report, or you can enter a range of point numbers.
You may now open the file in notepad or any other text editor and print
it out.
Inverse
Inverse points by entering
point numbers. You will be prompted for the first point number and then
the second point number.
A bearing and distance will
be displayed at the command prompt.
Intersections
Find intersections by Bearing
- Bearing, Bearing - Distance, Distance - Distance, Line - Arc, and Point
offset to a line.
Bearing-Bearing:
You will be prompted for
the first point number and bearing (or enter two point numbers for bearing) and then the second point number and
bearing (or enter two point numbers for bearing), the intersection will be displayed at the command prompt and you
will be asked if you would like to set a new point there.
Bearing-Distance:
You will be prompted for
the first point number and bearing (or enter two point numbers for bearing) and then the second point number and
distance, the intersection will be displayed at the command prompt and
you will be asked if you would like to set a new point there.
Distance-Distance:
You will be prompted for
the first point number and distance and then the second point number and
distance, the intersection will be displayed at the command prompt and
you will be asked if you would like to set a new point there.
Note: If two answers are found, you will be asked to choose the answer you want to use.
Line-Arc:
You will be prompted for
the first point number and the second point number to define a line, then
you will be prompted for a point number at the center of the arc and a
radius, the intersection will be displayed at the command prompt and you
will be asked if you would like to set a new point there.
Point offset to a line:
You will be prompted for
the first point number and the second point number to define a line, then
you will be prompted for a point number, the bearing and distance from
the point perpendicular to the line will be displayed at the command prompt.
Draw by point number
You may draw a line from
point to point by entering the point number.
Import / Export
Import points from an ascii
file or export points to an ascii file. A file is created in a variety
of formats (including: Point Number, Northing, Easting, Elevation and Description).
You may also create a Point List for viewing in the same format.
Import line file
Linework may be created in the drawing by reading a point file with linework coded into it. This may be the same file used to import the points. Line descriptors must start with a "." right after the key description (if any). The line name can be anything, such as "line1" or "line2" (An example would be .line1). If the line is on a curve place a "-" after the "." (An example would be .-line1).
To end a line, place a "!" after the line descriptor (an example would be .line1! ). This will stop the line at this point and it will restart at the next descriptor for that line.
You may also end a line by placing ".." in front of the descriptor (an example would be ..line1 ). It is preferred that you use .line1! instead of ..line1 to close a line.
Only one control code (the last one) will be honored in a line descriptor.
To close a line, place a "+" after the line descriptor (an example would be .line1+ ). This will close the line back to the beginning point.
To join the last point shot into a line, place a "*" after the line descriptor (an example would be .line1* ). This will add the last point shot into the line, inserted before the current point.
You may place several line descriptors on one point (an example would be .ep!.bc.sw ).
In the following example
there is an iron pipe found bent on the edge of pavement. To code the iron
pipe we have set up the key description of "ip" and the line name is "ep1"
also we want to note that the pipe was bent, thus the description would
read in the following format: key description (if any) "." Line name, a
space, and then the note. Example: ip.ep1 bent.
The following are valid line descriptions:
.ep1
ip.ep1
ip.ep1 bent
ip.ep1 some note
Notice that there are no spaces till the beginning of the note.
If a line description was ep1, then line ep1 would be placed
on layer ep. Any line name beginning with "ep" would be placed on layer
ep.
Manipulate points
Move points - Select a group of points and move them. Select the 3d nodes (corresponding 2d nodes are selected automatically).
Rotate points - Select a group of points and rotate them. Select the 3d nodes (corresponding 2d nodes are selected automatically).
Note: You may use a window or crossing since the routine will only select
the 3d nodes.
Reassociate points -
This command will move all 2d nodes to their correct location with the 3d nodes.
(In case a 2d node gets moved by accident or a 3d node is moved without using the "Move points" command.)
Resize points - Select
a group of points and change the size of the point display. (point no.
elevation and description)
Note: This command will not change the size of a block placed at the point
(such as a power pole or iron pipe).
Twist points - Select
a group of points and pivot the points about their placement point.
Change elevation
- Select a group of points and change the elevation by adding or subtracting.
Convert elevation
- Select a group of points and change the elevation by mutiplication.(such
as converting between metric and English)
Resize blocks - Select
a group of blocks and change their size. (such as power pole or iron pipe)
Note: This command will not affect the points.
Note: To resize both points
and blocks - use resize points then use resize blocks.
Drafting
Drawing Setup - Select English or Metric units -changes the ltscale and labeling precision, changes dimscale to the scale of the drawing, it changes textsize to one tenth the drawing scale (English) and to 3mm (Metric) and it changes other dimension variables (you may edit dpset.lsp in the c:Program FilesCogoSoftwareDpcogo directory if you want to change these settings).
NOTE: many of our programs use the ltscale setting to scale objects they create.
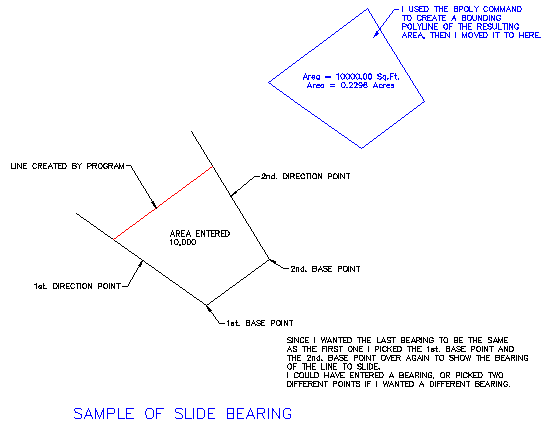
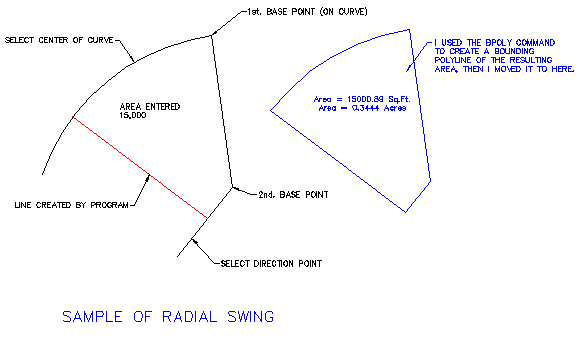
Design Lots by Area
You may let the program
automatically design lots by area using Slide Bearing, Hinge or Radial methods.
To change the desired result pick the resulting bearing in reverse order.
Layers
You may manipulate layers
by picking entities on desired layers. The options are:

Isolate Layer - Sets
first selected layer current and turns off all unselected layers.
Undo Isolate Layer
- Restores layer settings.
Layer Off - Turns
off selected layers.
Undo Layer Off -
Restores layer settings.
Turn all layers on
- Turns all layers on.
Layer Match - Moves
selected entities to new layer.
Change to current layer
- Moves selected entities to current layer.
Make Layer Current
- Sets selected layer current.
Layer Walk - Displays layers one at a time.
Layer Lock - Locks
selected layers.
Undo Layer Lock -
Restores layer settings.
Layer Unlock - Unlocks
selected layers.
Layer Freeze - Freezes
selected layers.
Undo Layer Freeze
- Restores layer settings.
Thaw all layers -
Thaws all layers.
Text
Text Leader - Draws
a leader and begins mtext.
Text leader box -
Draws a leader and places a box around the text.
Box around text -
Select text to place a box around (ltscale will control the space between
text and box).
Trim behind text -
Trims all entities behind selected text.
Draw traverse - You may draw by entering bearings or azimuths and distances and curves.
Draw by deflection - You may draw by entering a deflection angle from a line.
Draw Curves - You may draw a curve tangent to two lines or tangent to the end of a line. You may draw curves by PC-RP-PT, PC-POC-PT and PC-PI-PT
Graphic Scale - Places a graphic scale at the desired location (ltscale variable will determine the size and units).
Lot Numbers - Will place incremented numbers at the desired location.
Label Stations - Will place station labels along a line, arc or polyline.
Profiles
Draw profile grid
- Draws and annotates a profile grid, based on current UCS. Pick lower
left and upper right limits.
Label profile elevations
- Labels elevations along a datum line as you pick the point in a profile,
based on current UCS.
Extract Profile -
Extracts a profile from a tin of 3dfaces or 3dlines along a defined line.
Labels
You may label the bearing
and distance of a line by selecting it or by picking points.
You may label a curve (radius,
length) or (delta, radius, tangent, length and chord bearing &
length) by selecting it or by picking points.
NOTE: LABELING WILL USE THE UNITS (ENGLISH OR METRIC) THAT IS SELECTED IN DRAFTING-- DRAWING SETUP. LABELING WILL ALSO USE THE CURRENT PRECISION SETTINGS.
Label lines BRG
Label by selecting a line
Brg dist / - Label
bearing and distance on top of line.
/ Brg Dist - Label
bearing and distance on bottom of line.
Brg / Dist - Label
bearing on top and distance on bottom of line.
Dist / Brg - Label
distance on top and bearing on bottom of line.
Dist / - Label distance
on top of line.
/ Dist - Label distance
on bottom of line.
Note - Label bearing
and distance with a leader to a line.
point to point
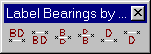
Label by selecting 2 points for a line
Brg dist / - Label
bearing and distance on top of line by selecting points.
/ Brg Dist - Label
bearing and distance on bottom of line by selecting points.
Brg / Dist - Label
bearing on top and distance on bottom of line by selecting points.
Dist / Brg - Label
distance on top and bearing on bottom of line by selecting points.
Dist / - Label distance
on top of line by selecting points.
/ Dist - Label distance
on bottom of line by selecting points.
Label lines AZN
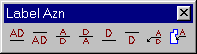
Label by selecting a line
Azn dist / - Label
North azimuth and distance on top of line.
/ Azn Dist - Label
North azimuth and distance on bottom of line.
Azn / Dist - Label
North azimuth on top and distance on bottom of line.
Dist / Azn - Label
distance on top and North azimuth on bottom of line.
Dist / - Label distance
on top of line.
/ Dist - Label distance
on bottom of line.
Note - Label North azimuth
and distance with a leader to a line.
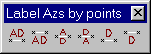
point to point

Label by selecting 2 points for a line
Azn dist / - Label
North azimuth and distance on top of line by selecting points.
/ Azn Dist - Label
North azimuth and distance on bottom of line by selecting points.
Azn / Dist - Label
North azimuth on top and distance on bottom of line by selecting points.
Dist / Azn - Label
distance on top and North azimuth on bottom of line by selecting points.
Dist / - Label distance
on top of line by selecting points.
/ Dist - Label distance
on bottom of line by selecting points.
Label lines AZS
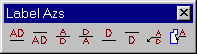
Label by selecting a line
Azs dist / - Label
South azimuth and distance on top of line.
/ Azs Dist - Label
South azimuth and distance on bottom of line.
Azs / Dist - Label
South azimuth on top and distance on bottom of line.
Dist / Azs - Label
distance on top and South azimuth on bottom of line.
Dist / - Label distance
on top of line.
/ Dist - Label distance
on bottom of line.
Note - Label South azimuth
and distance with a leader to a line.
point to point
Label by selecting 2 points for a line
Azs dist / - Label
South azimuth and distance on top of line by selecting points.
/ Azs Dist - Label
South azimuth and distance on bottom of line by selecting points.
Azs / Dist - Label
South azimuth on top and distance on bottom of line by selecting points.
Dist / Azs - Label
distance on top and South azimuth on bottom of line by selecting points.
Dist / - Label distance
on top of line by selecting points.
/ Dist - Label distance
on bottom of line by selecting points.
Label curves
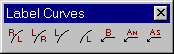
Label by selecting a curve
Rad ( Len - Label
radius on outside and arc length on inside of curve.
Len ( Rad - Label
arc length on outside and radius on inside of curve.
Len ( - Label arc
length on outside of curve.
( Len - Label arc
length on inside of curve.
Note Brg - Label Delta,
Tangent, Arc length, Radius, Chord bearing and Chord distance in a note
off the curve.
Note Azn - Label Delta,
Tangent, Arc length, Radius, Chord Azimuth North and Chord distance in a note
off the curve.
Note Azs - Label Delta,
Tangent, Arc length, Radius, Chord Azimuth South and Chord distance in a note
off the curve.
Label curves (point)
Label by selecting 3 points to define
a curve (center start end - counterclockwise)
Rad ( Len - Label
radius on outside and arc length on inside of curve.
Len ( Rad - Label
arc length on outside and radius on inside of curve.
Len ( - Label arc
length on outside of curve.
( Len - Label arc
length on inside of curve.
Label coords -
Label coordinates by picking a point.
Label areas - Label
areas in square feet and acres (or Hectares) by selecting a closed polyline.
Listing
Write Parcels descriptions
Closure Reports
List lines - You
may list the bearing and distance of a line by selecting it.
List curves - You
may list a curve (delta, radius, tangent, length and chord bearing &
length) by selecting it.
Let the program write your parcel descriptions! Select a commencement point, then select a commencing polyline, then select a parcel boundary, which is a closed polyline.
The legal description is written to a text file that you may edit in your favorite word program.
Print a detailed traverse and closure report using Bearings or Azimuths describing each leg of the traverse along with the area and error of closure.